


The Problem: Copilot Without Project Context
Modern AI tools like GitHub Copilot are powerful, but when working with a large Laravel codebase, Copilot often lacks project awareness. It may generate:
- Generic answers
- Incorrect routes
- Outdated Laravel syntax
- Hallucinated code
The Solution: Laravel Boost MCP
Laravel Boost solves this problem using MCP (Model Context Protocol) by giving AI tools direct access to your real Laravel project context-routes, models, migrations, configs, Filament resources, and more.
In this guide, I'll show you exactly how to set up Laravel Boost MCP with GitHub Copilot in VS Code, using the official and correct workflow, including common Windows issues and fixes.
What You'll Achieve After This Setup
After completing this guide:
- GitHub Copilot understands your actual Laravel project
- AI responses are framework-accurate
- Copilot can reason about routes, models, migrations, Filament resources, and Laravel version
- No more hallucinated code
Requirements
- Laravel project (Laravel 10+ recommended)
- PHP & Composer installed
- VS Code
- GitHub Copilot enabled in VS Code
Step 1: Install Laravel Boost
Open your Laravel project directory and run:
composer require laravel/boost --dev
This installs Laravel Boost as a development dependency.
 Screenshot: Composer installing laravel/boost
Step 2: Run Laravel Boost Installer
After installation, run:
php artisan boost:install
This starts an interactive setup wizard.
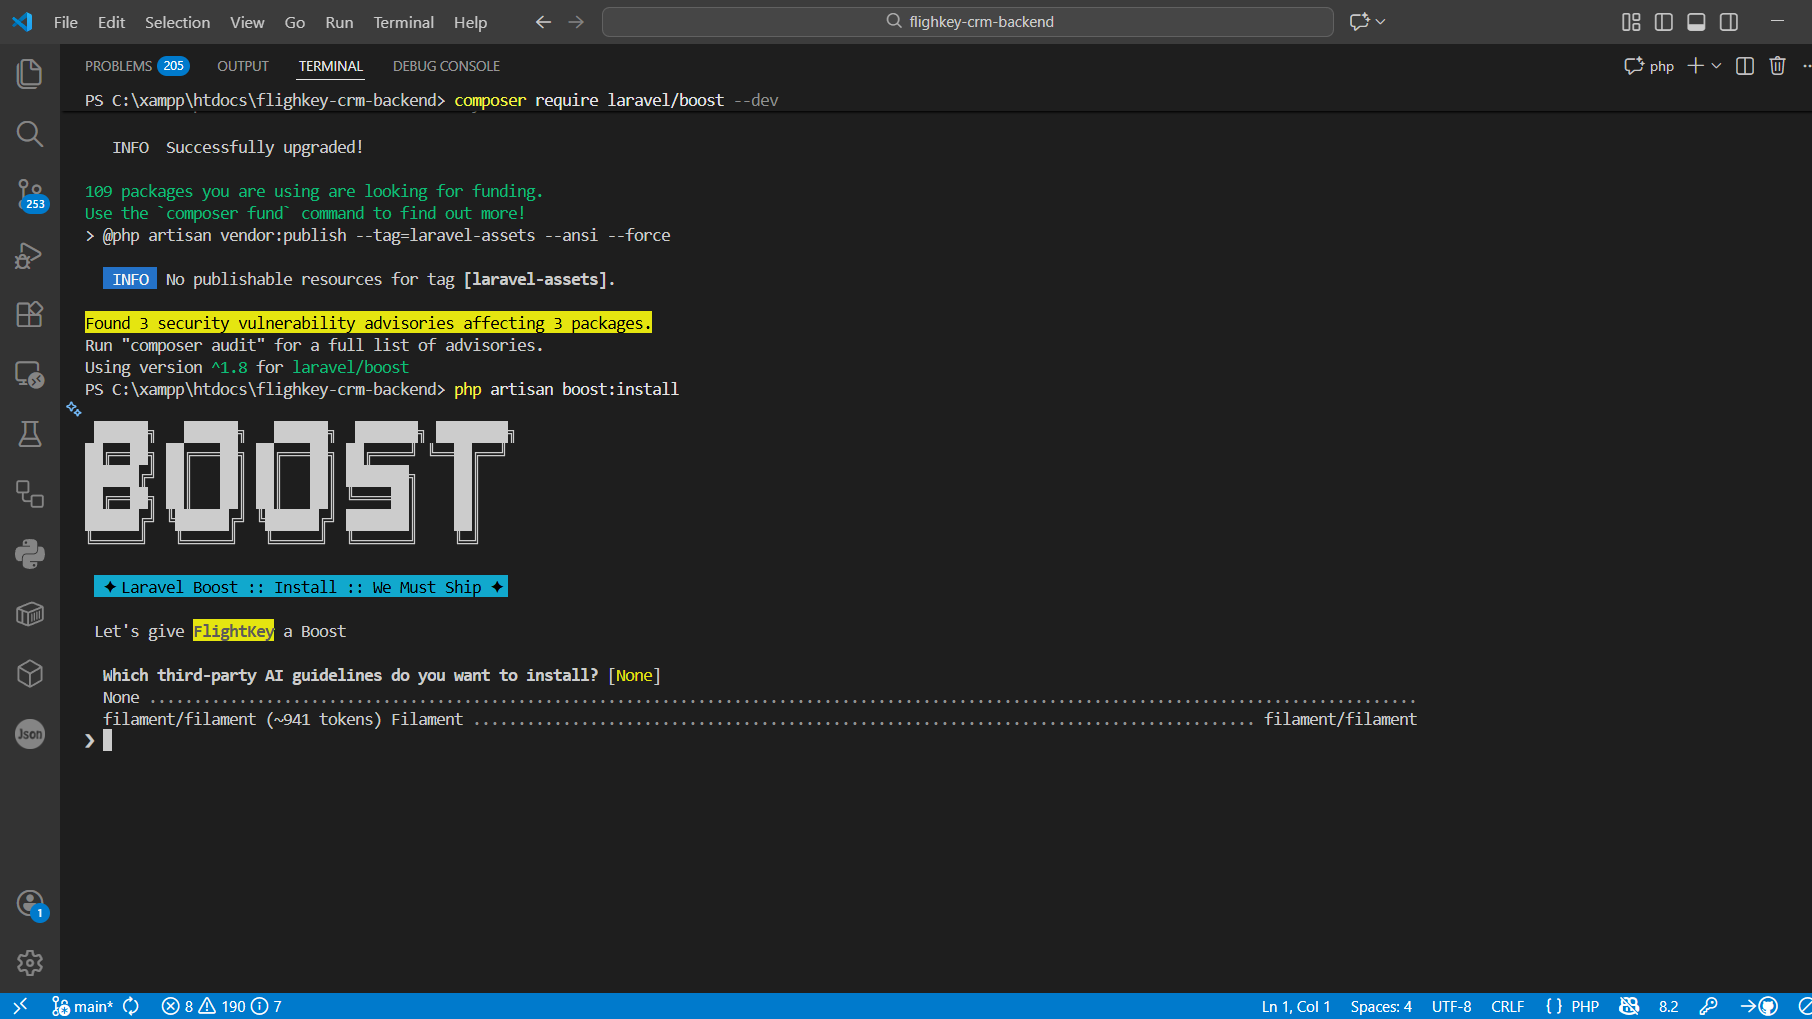
 Screenshot: Laravel Boost install welcome screen
Step 3: Choose Third-Party AI Guidelines (Important)
You'll see this prompt:
Which third-party AI guidelines do you want to install?
Options may include:
- None
- filament/filament
What to choose?
- Using Filament Admin Panel? → Select
filament/filament - API / backend only? → Choose
None
WARNING - Windows PowerShell Tip: Arrow keys may not work in the terminal. In that case, type the full value exactly:
filament/filament
 Screenshot: Third-party AI guidelines selection
Step 4: Select Code Editor (VS Code)
Next prompt:
Which code editors do you use to work on this project?
Leave the default:
VS Code
Just press Enter.
 Screenshot: Code editor selection (VS Code)
Step 5: Select AI Agent (GitHub Copilot)
You'll then see:
Which agents need AI guidelines?
Choose:
GitHub Copilot
This ensures Copilot receives Laravel-specific context.
 Screenshot: GitHub Copilot selection
Step 6: Installation Completes
At this point, Boost will:
- Install MCP configuration
- Register Laravel tools
- Configure VS Code MCP server
You should see a success message like:
VS Code... ✓ Boost
Enjoy the boost 🚀
 Screenshot: Boost installation success screen
Step 7: Start MCP Server (OFFICIAL METHOD)
IMPORTANT - Do NOT run:
- [DO NOT]
php artisan boost:serve - [DO NOT]
php artisan boost:mcp
For VS Code, the official method is IDE-managed MCP.
Do this instead:
- Open VS Code
- Press:
Ctrl + Shift + P - Run:
MCP: List Servers
 Screenshot: MCP: List Servers command
Step 8: Select Laravel Boost MCP Server
You'll see something like:
laravel-boost Stopped
Select laravel-boost.
 Screenshot: MCP server list (laravel-boost stopped)
Step 9: Start the Server
After selecting laravel-boost, choose:
Start Server
VS Code will now start the MCP server internally.
 Screenshot: Start Server action
Step 10: Confirm MCP Is Running
Once started, you'll see logs like:
Starting server laravel-boost
Connection state: Running
Discovered 15 tools
This confirms:
- MCP server is running
- Laravel tools are detected
- Copilot is connected
 Screenshot: MCP server running (Discovered tools)
Step 11: Verify in GitHub Copilot Chat
Open GitHub Copilot Chat and type:
@laravel list tools
If tools appear, your setup is complete.
 Screenshot: Copilot showing Laravel tools
How to Use Laravel Boost with Copilot (Examples)
Try prompts like:
- Explain this Laravel project structure
- Which routes use auth middleware?
- Create a Filament resource for the User model
- Refactor this controller using services
Copilot now uses real project context, not guesses.
Common Issues & Fixes
Arrow keys don't work in terminal
Solution:
- Type full option name
- Or press Enter on defaults
boost:serve command not found
Solution:
- Expected behavior
- VS Code manages MCP internally
Server shows "Stopped"
Solution:
- Use
MCP: List Servers→Start Server
Final Thoughts
Laravel Boost + MCP transforms GitHub Copilot from a generic autocomplete tool into a Laravel-aware AI assistant.
If you work on:
- Large Laravel projects
- Filament admin panels
- APIs with complex routing
This setup is absolutely worth it.
Resources
- Laravel Boost Documentation
- Model Context Protocol (MCP)
- GitHub Copilot in VS Code
- Filament Admin Panel
Have questions about setting up Laravel Boost? Share them in the comments below!